
Knowledge SuperBox S8
How to Set Up SuperBox S8 for Live TV and Sports: Complete Guide





Setting up your SuperBox S8 (S8 Pro, S8 Max, S8 Ultra) takes less than 5 minutes and requires zero technical expertise: simply connect the HDMI cable and Universal Type-C 5V/2A power supply, connect to Dual-Band Wi-Fi 6 or 1000Mbps Gigabit Ethernet, pair the illuminated RC-200L Backlit Voice Remote via Bluetooth 5.2, and download the core Blue Apps from the pre-installed App Store to instantly unlock 2,000+ live broadcast channels, 15,000+ VOD movies, and 7-Day Time Shift with $0 monthly fees for life.
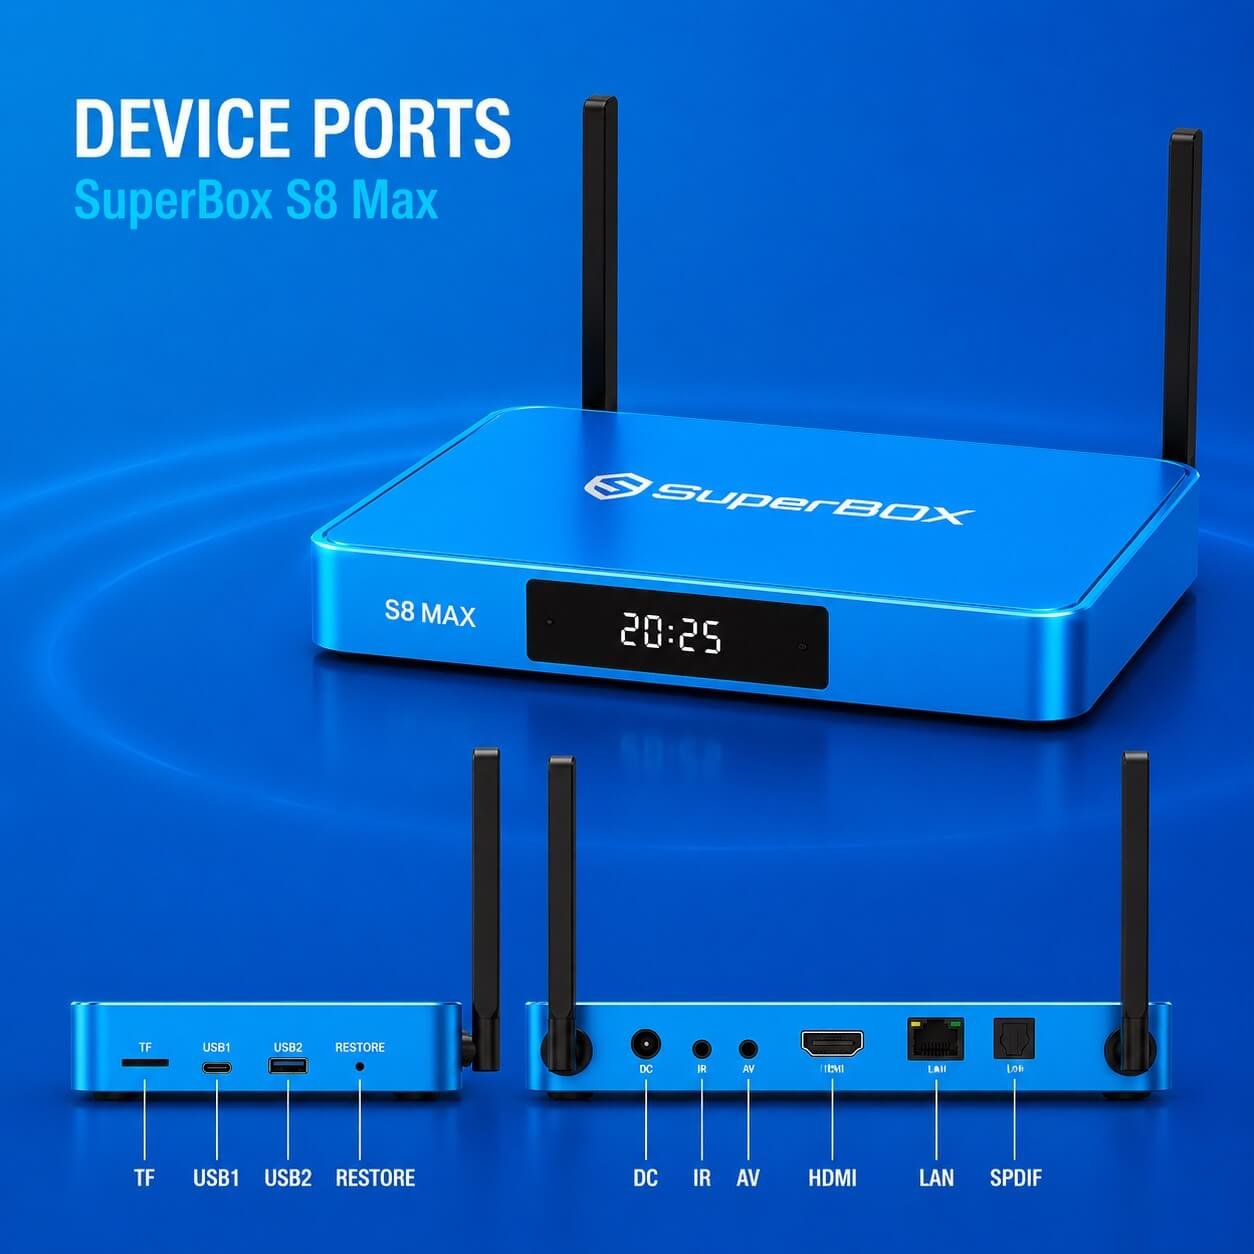
- 1. Hardware Connection: Plug the included HDMI cable into your TV, connect the Type-C 5V/2A power adapter, and optionally plug in an Ethernet cable to the 1000Mbps LAN port for maximum streaming stability.
- 2. Initial Display & Network: Power on your TV, select the correct HDMI input, set screen scaling to 100%, and connect to your Wi-Fi 6 network or wired LAN.
- 3. Bluetooth Remote Pairing: Press the Voice button or hold [OK + Back] to pair the RC-200L Backlit Remote for responsive voice search and dark-room navigation.
- 4. App Store Downloads: Open the pre-installed App Store to download Blue TV, Blue VOD, Playback, and the 7 Bonus Prime Apps.
- 5. Automatic Warranty Activation: Your official 1-Year Manufacturer Replacement Warranty activates automatically upon downloading your first application.
Step 1: Connect the Hardware
Connect the HDMI Cable
Plug one end of the included HDMI cable into the HDMI output on the back of the SuperBox and connect the other end to an available HDMI input on your TV.
Connect the Power Adapter
Plug the supplied power adapter into a wall outlet and connect it to the SuperBox. The device typically powers on automatically once it receives power.
Prepare the RC-200L Backlit Voice Remote
Insert the included AAA batteries into the remote before continuing with the setup process.
Optional: Use a Wired Network
While connecting an Ethernet cable provides the lowest latency, users streaming over high-speed wireless can follow our dedicated guide on how to connect superbox s7 to wifi 6 to configure dual-band router bands and eliminate interference.
Even with high-speed fiber internet, local bandwidth throttling or router channel congestion can cause stream delays during live sports. Consulting our 7-step guide on superbox s7 buffering provides quick router tweaks and DNS optimizations to ensure smooth, lag-free playback.
Step 2: Complete the Initial System Setup
After the SuperBox finishes booting, follow the on-screen instructions to complete the initial configuration.
Accept the User Agreement
Review the disclaimer and select Agree using the remote control.
Connect to Wi-Fi
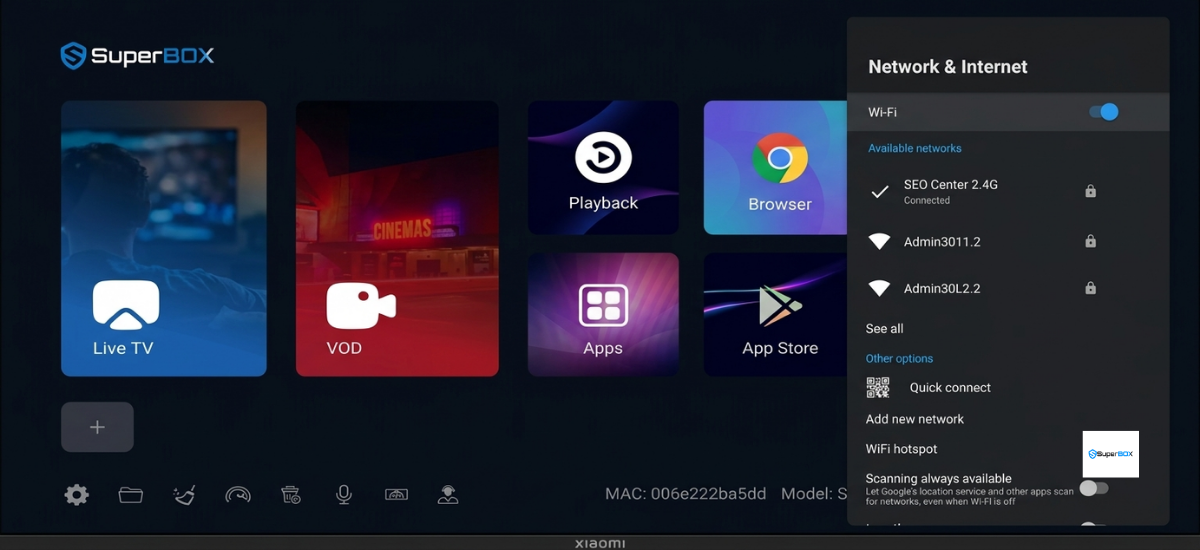
If you’re not using an Ethernet connection, choose your Wi-Fi network from the list, enter the password, and select Connect.
Adjust the Screen Size
The default display scale may be set to 96%, which can leave black borders around the screen. Use the remote’s arrow keys to increase the scaling—typically to 100%—until the image fills the entire display, then select Finish.
Over several months of continuous streaming, accumulated temporary video files and background app data can gradually consume internal RAM. Following our step-by-step tutorial on clear cache on superbox s7 frees up system memory and prevents menu sluggishness without erasing user settings.
Step 3: Pair the Bluetooth Remote
The remote initially communicates through infrared, so it must be pointed directly at the SuperBox. Pairing it via Bluetooth enables faster, more responsive control without requiring a direct line of sight. For advanced microphone shortcuts and speech commands, see our in-depth walkthrough on how to set up voice control on s7.
Method 1: Voice Button Pairing
Press the blue Voice button on the remote and follow the on-screen instructions. When prompted, hold the specified buttons until the display indicates that pairing has started.
Method 2: Manual Bluetooth Pairing
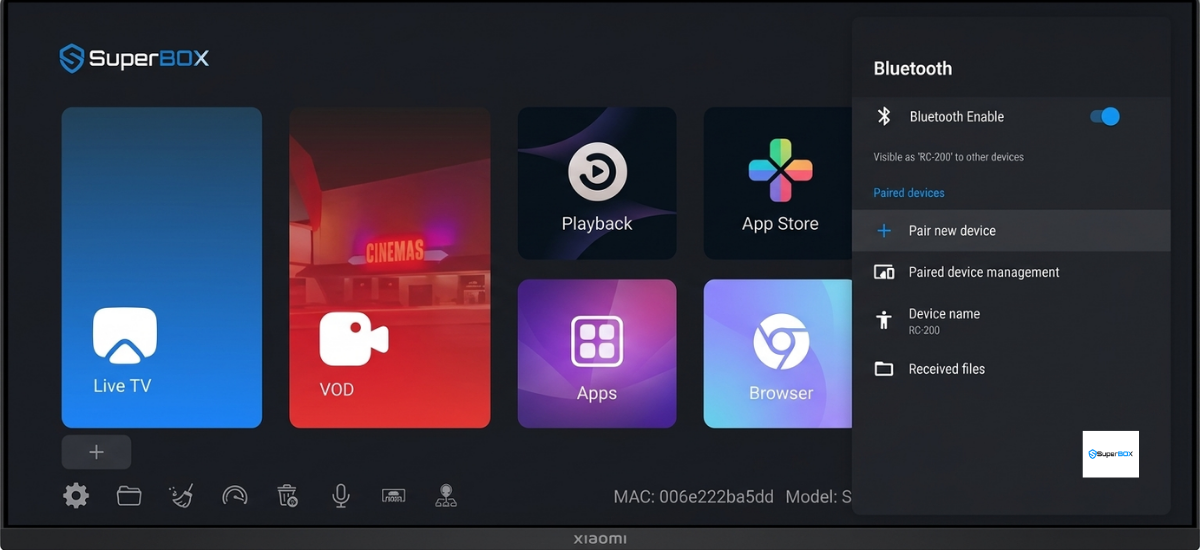
Press and hold the OK and Return/Back buttons simultaneously until the remote’s LED flashes red. Then navigate to:
Settings > Bluetooth > Pair New Device
Select RC200 from the list of available Bluetooth devices to complete the pairing.
Step 4: Optimize System Settings
Enable Automatic HDMI Output
Device Preferences > Display & Sound > Advanced Display Settings
Verify that HDMI Output Mode is set to Auto. This allows the SuperBox to automatically use the highest resolution supported by your television.
Set the Correct Time Zone
Open Date & Time and choose Set Time Zone. Select your local region, such as Eastern Time if applicable. A correctly configured time zone ensures the Electronic Program Guide (EPG) displays accurate program schedules for live TV.
Rename Your Device
You can assign a custom device name in the settings menu. This is especially useful if the SuperBox will be accessed over your home network or used as a media server.
Step 5: Install the Core Streaming Apps
The SuperBox includes its own App Store, where you can install its primary streaming applications.
Open the App Store
Locate the App Store icon on the home screen. It is initially green but may change to blue after the first system update.
Warranty Information
The device’s one-year warranty becomes active after the first application is downloaded from the App Store.
Download the Main Four Apps
Install the following core applications:
- Blue TV – Live television channels.
- Blue VOD – On-demand movies and TV series with a streaming-style interface. To master playback filtering, subtitle selection, and search indexing, consult our guide to the new blue vod superbox s8.
- Playback – Access previously aired sporting events and major news broadcasts from the past seven days.
- Backup TV – An alternative source for live TV and on-demand content when needed.
Wait until each application’s icon turns green, indicating that installation has finished successfully.
Step 6: Customize the Home Screen
Pin your most frequently used apps to make them easier to access.
Navigate to sections such as Live TV, VOD, or Playback, then select Add. Choose the corresponding application—for example, Blue TV under the Live TV section—to create a shortcut on the home screen.
If an app is updated later, its shortcut may be removed automatically. If this happens, simply use the Add option again to pin it back to the home screen.
Step 7: Maintenance and Support
Run a Speed Test
If you notice buffering or playback interruptions, use the built-in Speed Test tool located near the trash/delete icon at the bottom of the home screen. This provides a quick way to verify your current internet performance.
Contact Customer Support
If you need technical assistance, select the Customer Service option from the home screen. If your box ever encounters severe freezing or unrecoverable system slowdowns, our guide on superbox s7 running slow explains how to perform a factory recovery to restore out-of-the-box speeds.
Our article is based on the following video:
The article was updated on:
