
Knowledge SuperBox
How to Program an Original TV Remote to a SuperBox Remote





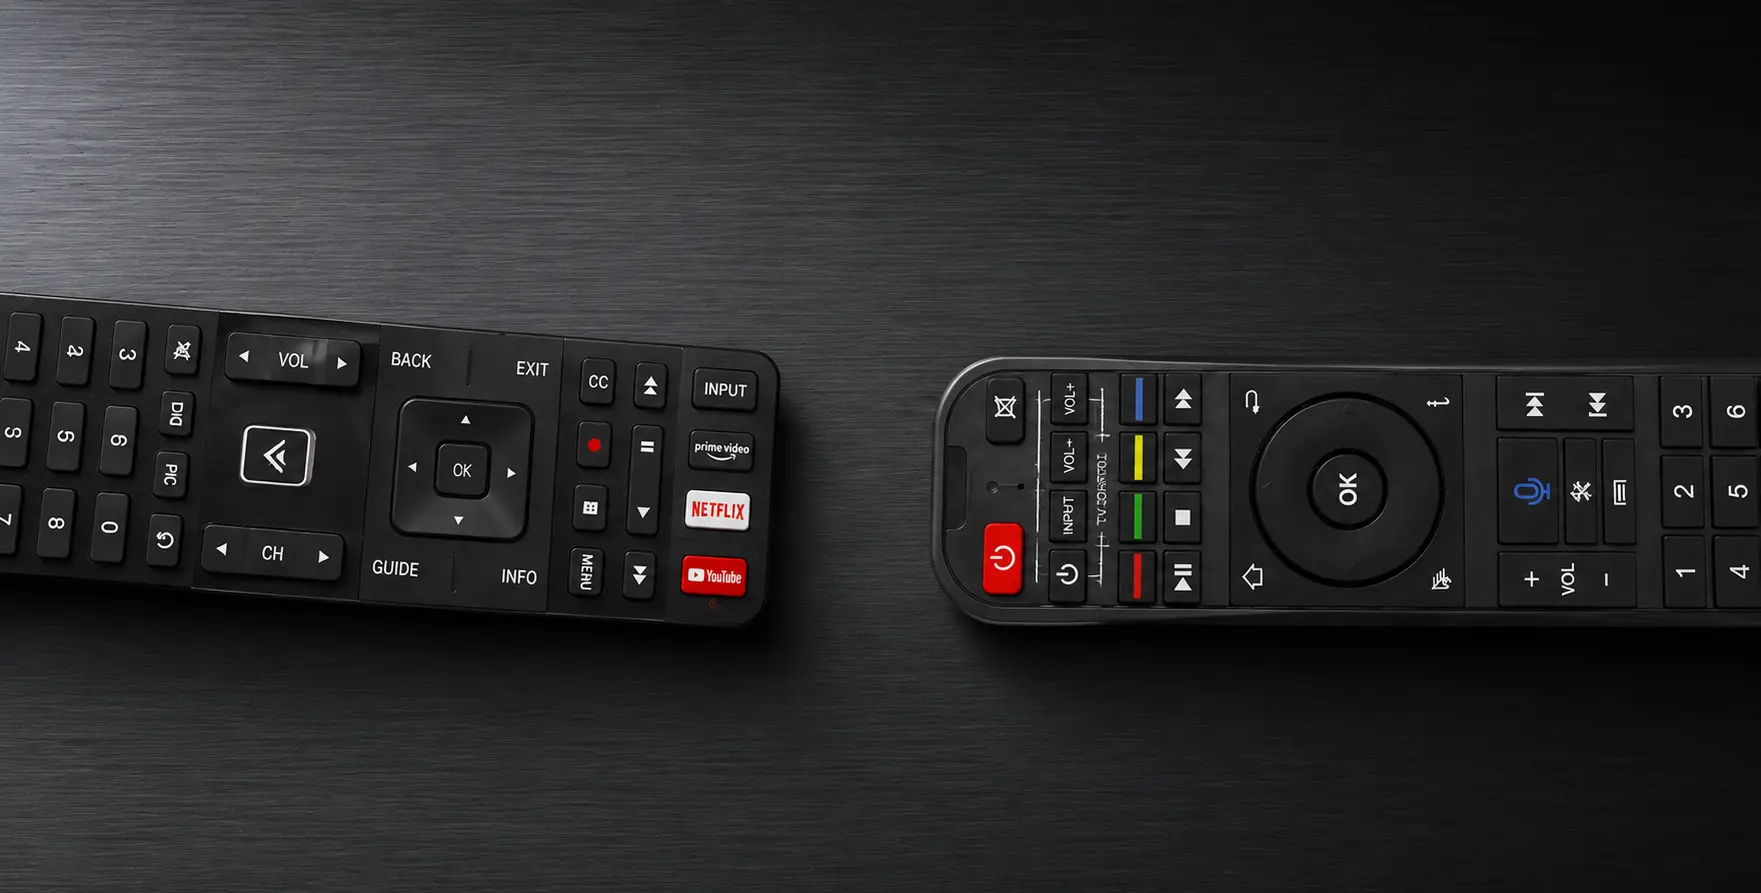
Managing a SuperBox, a television, and a soundbar can leave you switching between multiple remotes for even the simplest actions. SuperBox remote programming offers a cleaner solution: copy the essential commands from the original device remote onto the programmable buttons of the SuperBox remote.
Once the programming is complete, the SuperBox remote can handle the SuperBox as usual while also controlling the TV functions you use most often. If your volume comes from a soundbar, its volume commands can be copied in the same way.
This guide explains the complete programming process as a clear, standalone tutorial.
What SuperBox Remote Programming Does
The programming function allows the SuperBox remote to learn selected commands from another remote. Instead of replacing every function of the original TV remote, it focuses on the controls that are most useful during everyday viewing:
- TV power
- Volume up
- Volume down
- TV input
These functions are grouped in the programmable section at the top of the SuperBox remote. Each button receives its command individually, so the process is completed one function at a time.
The same approach also works when the television and audio are controlled by different remotes. The TV remote can provide the power and input commands, while the soundbar remote can provide the volume commands.
Quick Programming Overview
| Step | Action |
|---|---|
| 1 | Identify the programmable buttons on the SuperBox remote |
| 2 | Put the SuperBox remote into programming mode |
| 3 | Point the original remote and SuperBox remote toward each other |
| 4 | Select a button on the SuperBox remote to program |
| 5 | Send the matching command from the original remote |
| 6 | Repeat the process for the remaining buttons |
| 7 | Finish programming and test every copied command |
Step 1: Identify the Programmable Buttons
Begin with the button group at the top of the SuperBox remote. This is the section used for copied TV commands.
The main programmable functions are:
- Power
- Volume Up
- Volume Down
- Input
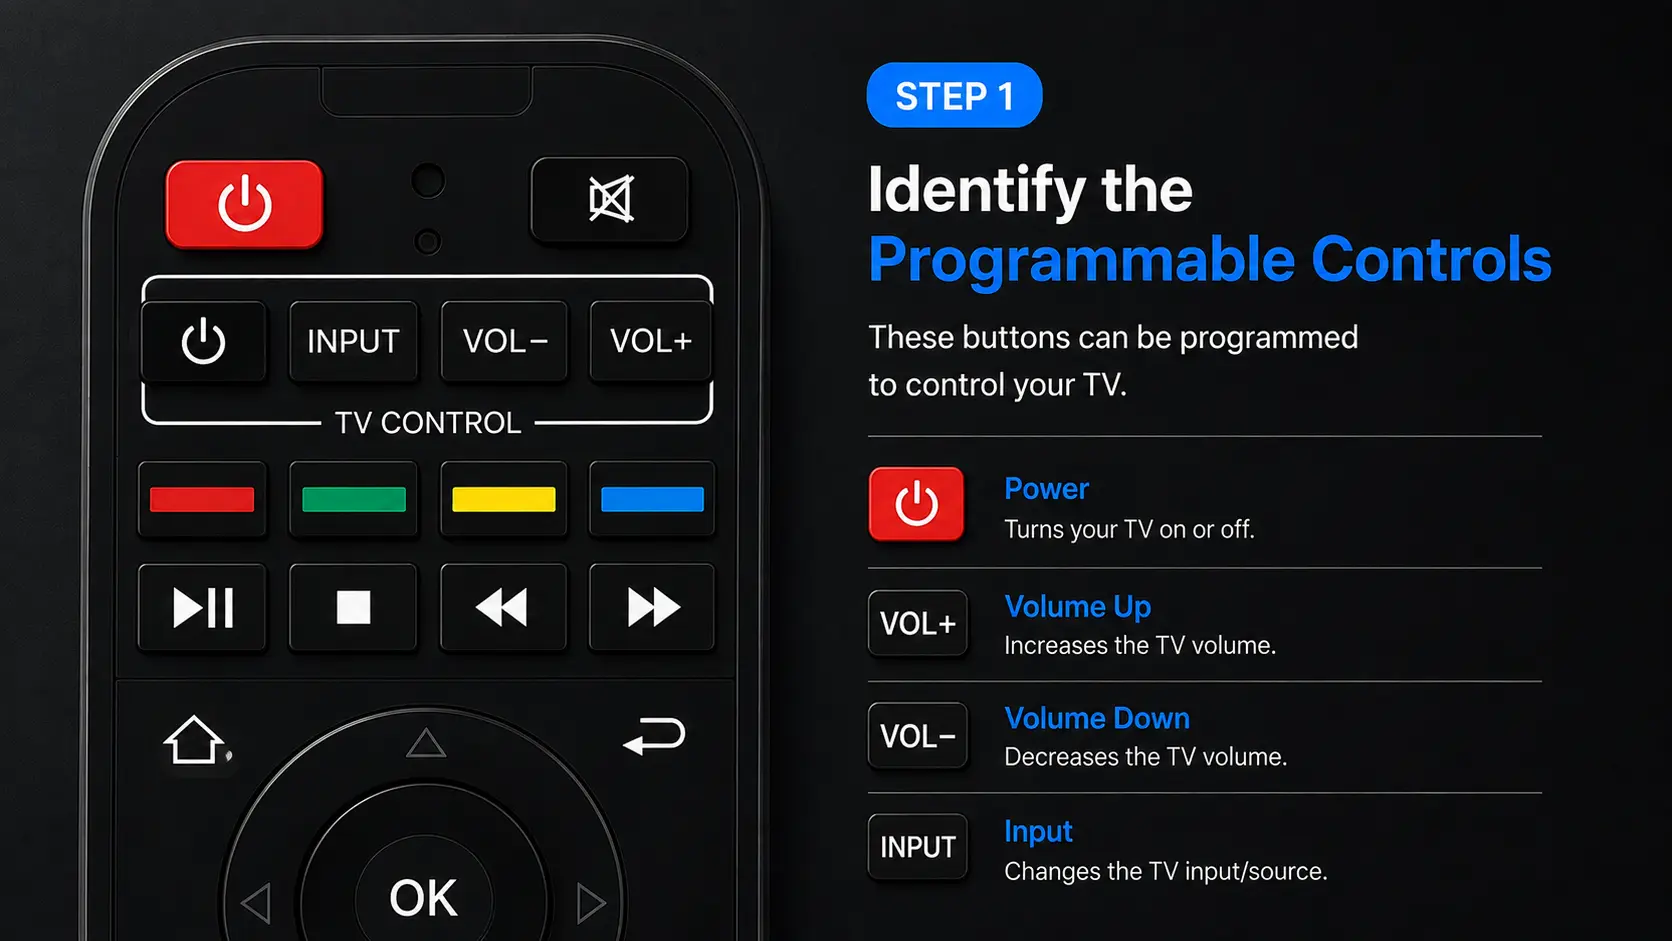
Choose which commands you want the SuperBox remote to learn before entering programming mode. If all four controls are useful to you, program them one by one rather than trying to copy several commands at once.
Step 2: Enter Programming Mode
Press and hold the programming power button in the top section of the SuperBox remote. Watch the red indicator light while holding the button.
When the light changes and remains on, the remote is ready to learn a command. Release the button and continue with the two remotes positioned in front of each other.
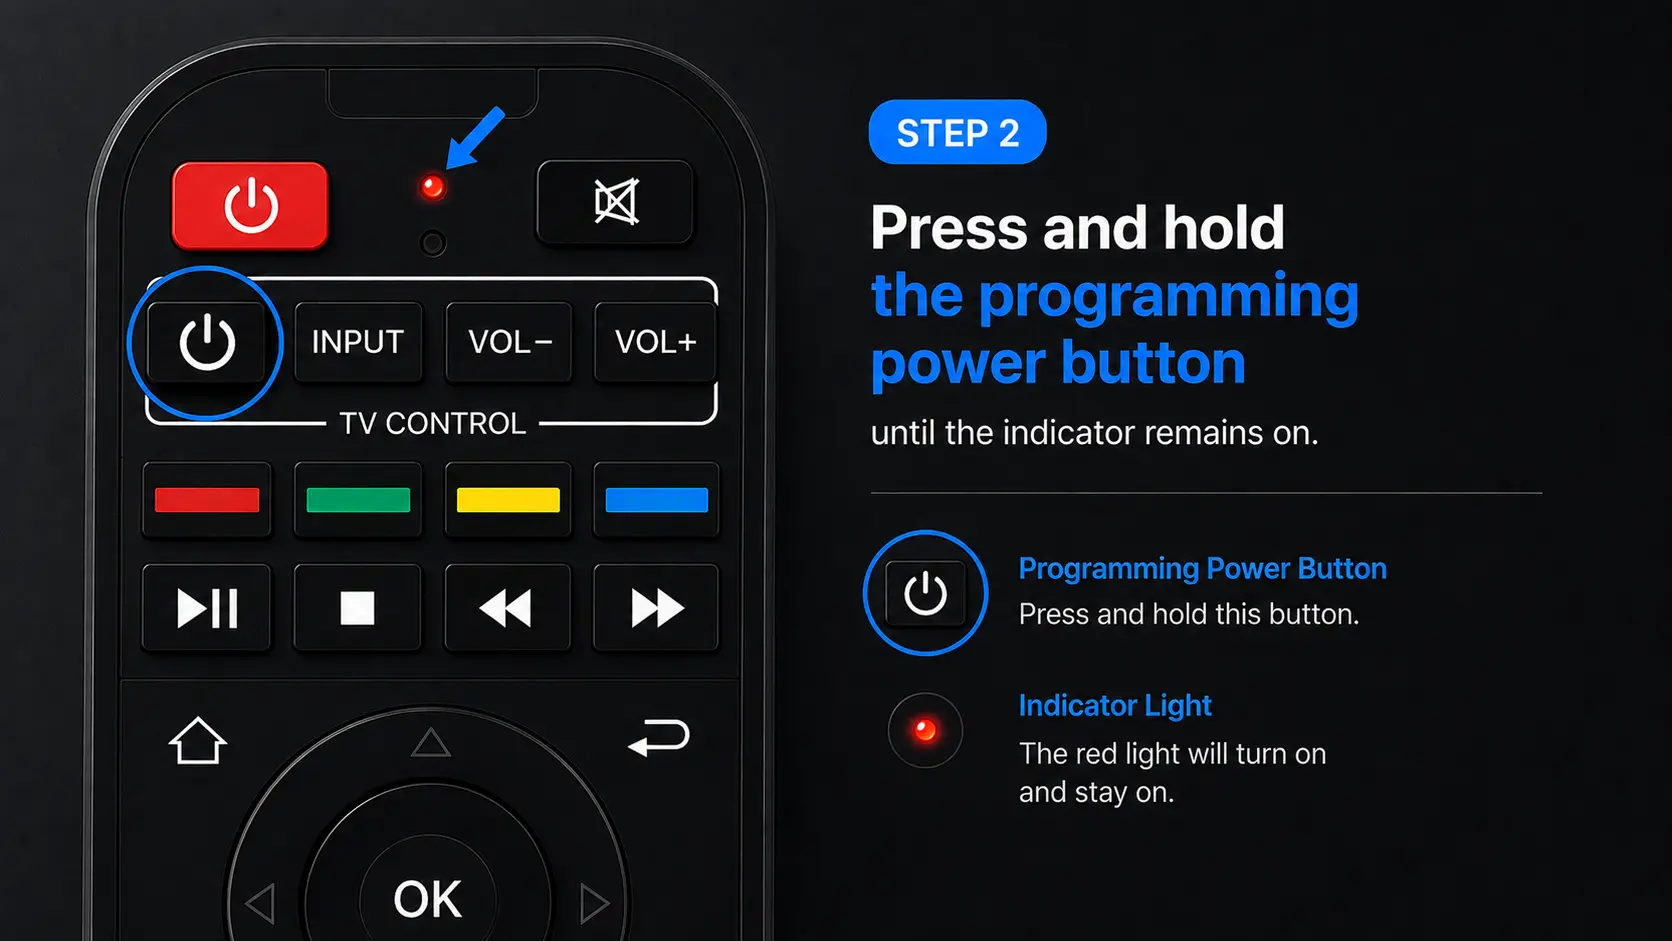
The indicator light is important throughout the process. It shows when the SuperBox remote has entered programming mode and responds again when a command is received. The indicator light shows when the SuperBox remote is ready to learn a command.
Step 3: Position the Two Remotes Face-to-Face
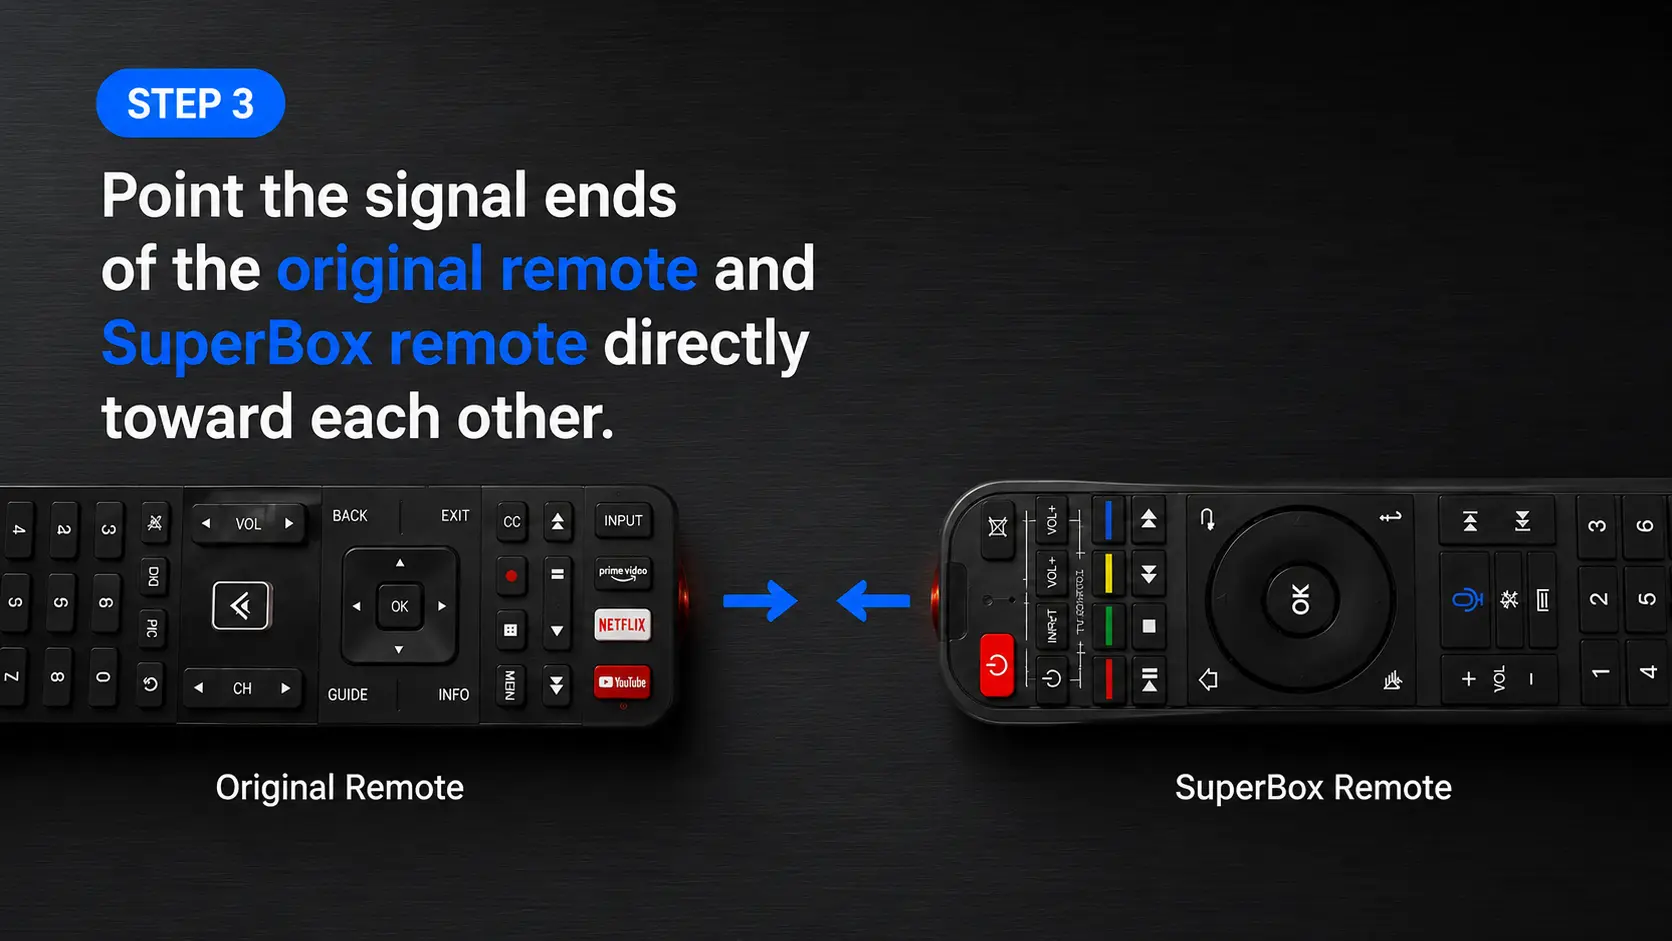
Point the signal end of the original TV remote directly toward the signal end of the SuperBox remote.
The remotes should face each other, not the television or the SuperBox. The command is being transferred from one remote to the other, so the two signal ends need to be aligned during programming.
Keep them steady in this position before moving to the first button.
Step 4: Copy the TV Power Command
The TV power button is a practical place to begin.
Select the programmable power button on the SuperBox remote. Then use the power button on the original TV remote to send the matching command while the two remotes remain pointed at each other.
Watch the indicator on the SuperBox remote. Its response confirms that the command has been received and stored.
After the power command has been copied, do not finish the session yet if you also want to program volume or input. Continue with the next button while the remotes are still arranged face-to-face.
Step 5: Program Volume Up and Volume Down
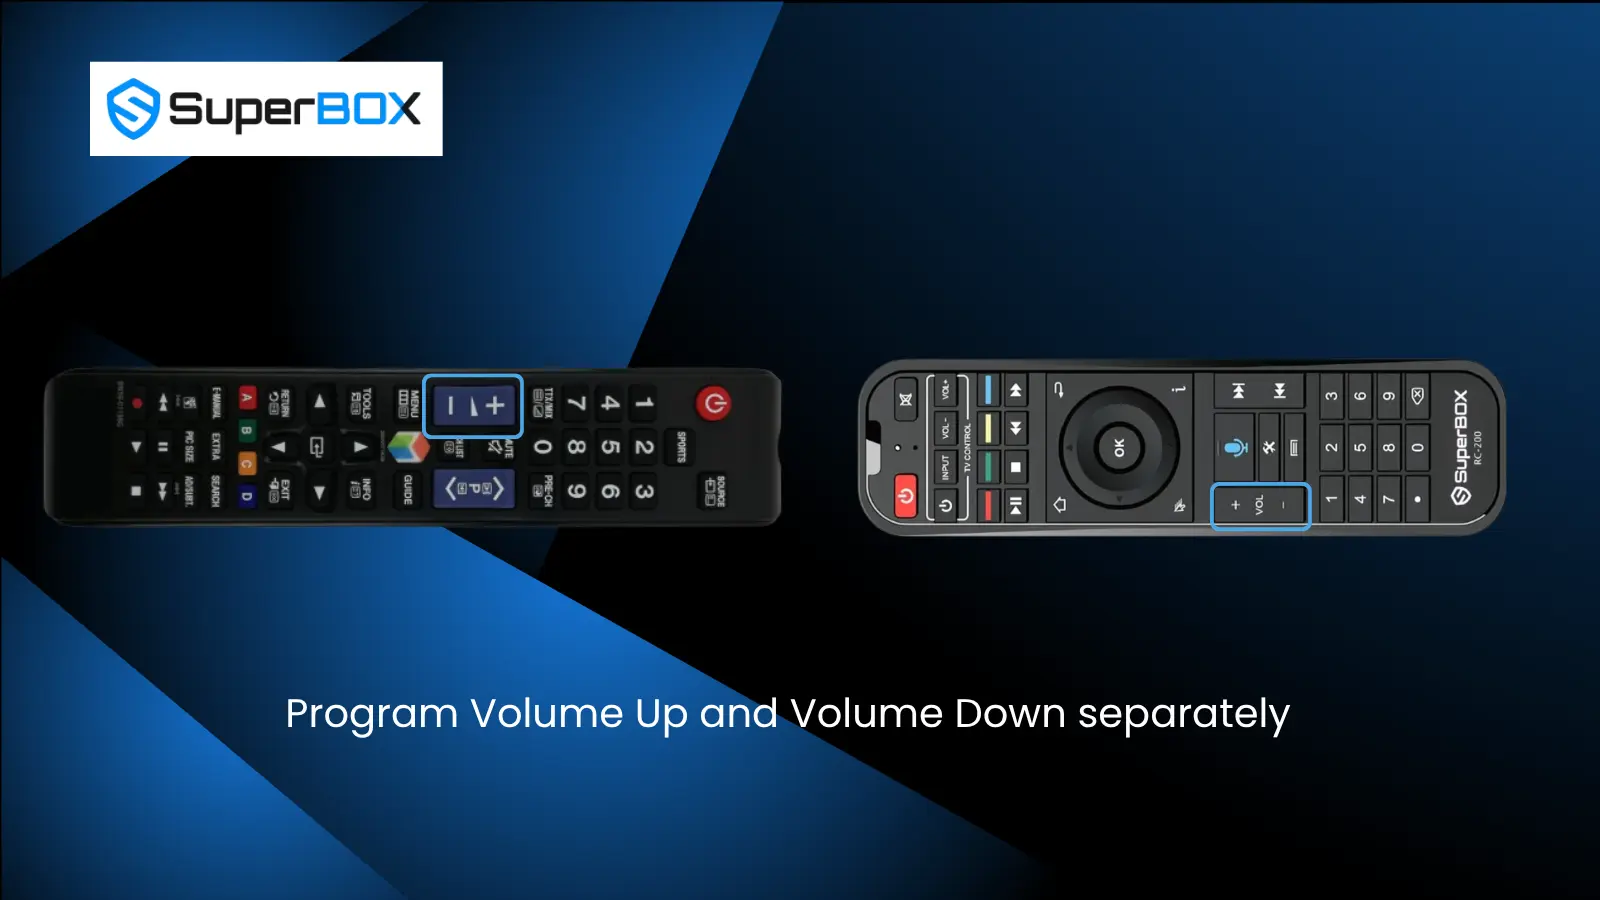
Volume Up and Volume Down are programmed separately. Each SuperBox button needs to learn the matching command from the remote that normally controls your audio.
If your TV controls the volume
Use the original TV remote as the source for both volume commands:
- Select Volume Up on the SuperBox remote.
- Send the Volume Up command from the TV remote.
- Select Volume Down on the SuperBox remote.
- Send the Volume Down command from the TV remote.
If your soundbar controls the volume
Use the soundbar remote instead:
- Keep the SuperBox remote in programming mode.
- Point the soundbar remote toward the SuperBox remote.
- Copy the soundbar’s Volume Up command.
- Copy the soundbar’s Volume Down command.
This makes it possible to combine commands from two original remotes. The power and input buttons can learn from the TV remote, while the volume buttons learn from the soundbar remote.
Step 6: Program the Input Button
The Input button is copied using the same one-button-at-a-time process.
Select the programmable Input button on the SuperBox remote. Keep the original TV remote facing it, then send the TV’s input command.
Wait for the indicator response before moving the remotes or finishing the programming session.
At this point, the programmable section can contain commands from one or two different source remotes:
| SuperBox Button | Command Source |
| Power | Original TV remote |
| Volume Up | Original TV remote or soundbar remote |
| Volume Down | Original TV remote or soundbar remote |
| Input | Original TV remote |
Step 7: Finish Programming and Test the Remote
Once all selected commands have been copied, finish the programming session and test the SuperBox remote.
Check each programmed function separately:
- Press Power and confirm that the TV responds.
- Press Volume Up and confirm that the volume increases.
- Press Volume Down and confirm that the volume decreases.
- Press Input and confirm that the TV opens or changes its input control.
If you copied the volume commands from a soundbar remote, verify that the soundbar responds to both volume buttons.
Testing one button at a time makes it clear which commands were stored successfully. If a particular button does not respond, repeat the programming process for that button rather than starting with every function again.
How to Combine TV and Soundbar Commands on One SuperBox Remote
The programming process is especially useful when a setup normally requires three remotes:
- One remote for the SuperBox
- One remote for the television
- One remote for the soundbar
The SuperBox remote can learn the television’s Power and Input commands, then learn Volume Up and Volume Down from the soundbar remote.
The process does not require every button to come from the same source. Each programmable button receives a separate command, so the source remote can be changed between functions.
Program the TV controls first, keep the SuperBox remote in programming mode, and then point the soundbar remote toward it when programming the volume buttons. Finish by testing the TV and soundbar controls independently.
The Most Important Detail: Program One Button at a Time
Each button is an individual learning action. Complete the full transfer for one function before moving to the next.
A clean order is:
- Power
- Volume Up
- Volume Down
- Input
For each function, select the target button on the SuperBox remote, send the matching command from the original remote, and wait for the indicator response. Then continue to the next function.
This sequence keeps the commands organized and makes the final test easier.
Frequently Asked Questions
Can the SuperBox remote learn commands from my original TV remote?
Yes. Its programmable buttons can copy the TV’s Power, Volume Up, Volume Down, and Input commands.
Do both remotes need to face the TV during programming?
No. The signal ends of the original remote and SuperBox remote should face each other because the command is being copied between the two remotes.
Are Volume Up and Volume Down programmed together?
No. Program them individually. Copy Volume Up first, then repeat the process for Volume Down.
Can the volume buttons learn from a soundbar remote?
Yes. Point the soundbar remote toward the SuperBox remote and copy its Volume Up and Volume Down commands.
Can TV and soundbar commands be stored on the SuperBox remote at the same time?
Yes. Power and Input can be copied from the TV remote, while the volume commands can be copied from the soundbar remote.
How do I know whether programming is working?
Watch the red indicator light on the SuperBox remote. It identifies programming mode and responds when a command is received.
What should I do if only one programmed button does not work?
Repeat the learning process for that individual button, then test it again.
Final Thoughts
SuperBox remote programming turns a multi-remote setup into a far simpler experience. The process begins by activating programming mode, aligning the original remote with the SuperBox remote, and copying each command individually.
Program Power and Input from the original TV remote. Program Volume Up and Volume Down from either the TV remote or the soundbar remote, depending on which device controls the audio. When every command has been stored, test the four buttons one at a time.
The result is a single SuperBox remote that handles the essential controls needed for everyday viewing. If you have any problems with SuperBox TV remote, you can contact SuperBox TV Box Store Tech Support via Whatsapp.
For a visual demonstration:
Reference
The article was updated on:
